Creating Native Modules
Introduction
It's often necessary to pass data or communicate updates between React Native and native. To achieve this, we implement native modules for each native platform, and then consume them within React Native via the NativeModules API.
If you've never worked with native modules within React Native, it's worth having a read of the documentation to familiarise yourself within reasoning and terminology.
This guide will assume the native module is required in both Android and iOS, if it's only needed on one platform the steps can be completed for that platform only, then the RN implementation needs to guard against that native module being missing on the other platform.
A native module contains three parts:
- The iOS code written in Swift.
- The Android code written in Kotlin.
- The React Native code which will consume the modules in Typescript.
When creating native modules, it's recommended you refer to other existing modules as they should be a good example of what's required. Combining that with the steps here should make it easy to get a basic native module implemented and working from React Native.
iOS
- Open the project in Xcode and expand the
mobile/Bridgefolder, in there you will see all our current native modules.
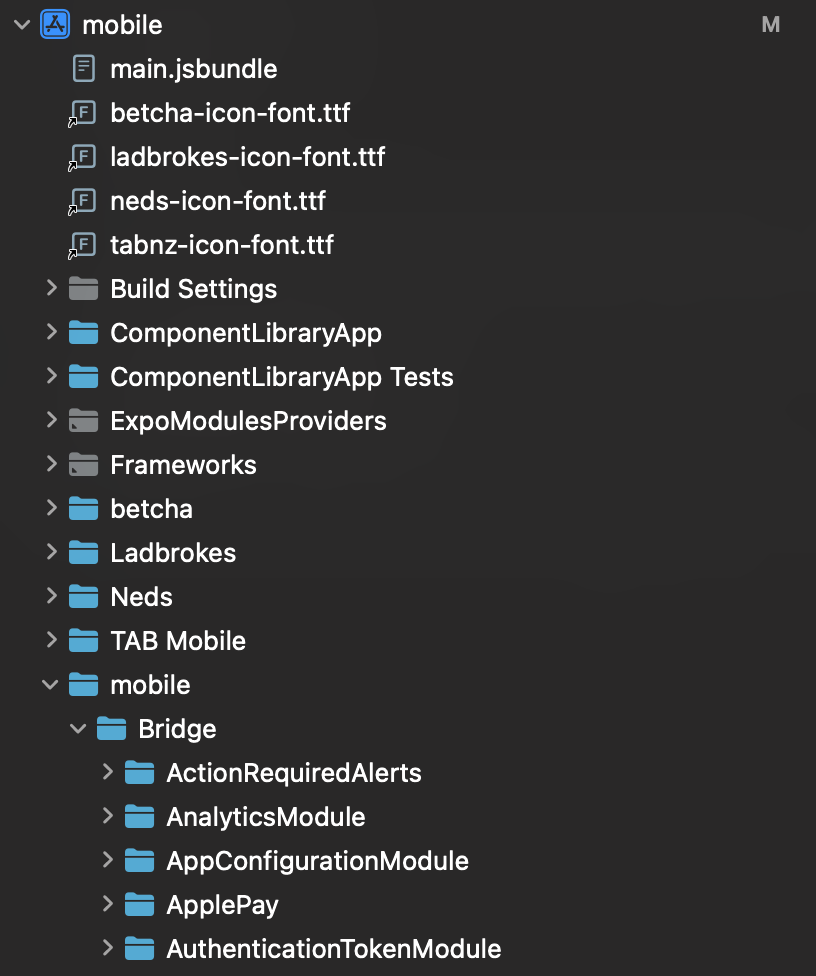
Right click the
Bridgefolder name in the navigator and selectNew Folder. This folder should match the name of your native module.Once you've created that folder, right click it and select
New File from Template.Select Swift file and hit next, name your file with your module name and ensure each brand target is selected.
In your newly created file, remove the automatic comment at the top. From there, the basic scaffold of a native module is:
import Bridge
import Foundation
import React
import ReactBridge

@ReactModule
class TestModule: NSObject, RCTBridgeModule {

}
Optionally, if you wish to use a name in JS different to the name of your class you can pass a parameter to @ReactModule:
@ReactModule(jsName: "TestModule")
This scenario should be uncommon, it's recommended to always name your module the same across RN, Android and iOS.
- Implement your methods as required. To create a method you can call from React Native, annotate it with
@ReactMethod.
import Bridge
import Foundation
import React
import ReactBridge

@ReactModule
class TestModule: NSObject, RCTBridgeModule {
    @ReactMethod
    @objc
    func logMessage(_ message: String) {
        print(message)
    }
}
After rebuilding the app, you should now be able to call this method from React Native via NativeModules.TestModule.logMessage("Test!").
Emitting events in iOS
Sometimes it's necessary to send data from native to React Native. This is done via an event emitter, which sends an event and data to a subscriber in React Native. Here's how to set that up:
- Modify your module to subclass
RCTEventEmitter.
import Bridge
import Foundation
import React
import ReactBridge

@ReactModule
class TestModule: RCTEventEmitter {
    @ReactMethod
    @objc
    func logMessage(_ message: String) {
        print(message)
    }
}
- To properly adhere to that subclass, you must also override the
startObserving,stopObserving, andsupportedEventsmethods fromRCTEventEmitter.startObservingis typically where you will subscribe to any publishers. If you don't need to run any logic you can omit this override.stopObservingis where you'd unsubscribe those publishers. If you don't need to run any logic you can omit this override.supportedEventsis where you declare your event keys which will be sent via the event emitter. This method has to be overridden.
import Bridge
import Foundation
import React
import ReactBridge

@ReactModule
class TestModule: RCTEventEmitter {
    override func startObserving() {
        // handle subscriptions
    }

    override func stopObserving() {
        // handle unsubscribing
    }

    override func supportedEvents() -> [String] {
        Event.allCases.map(\.rawValue) // this just tells the module only events in the Event enum can be used
    }

    @ReactMethod
    @objc
    func logMessage(_ message: String) {
        print(message)
    }

    func logMessageInReactNative() {
        sendEvent(
            withName: Event.logReactNativeMessage.rawValue,
            body: "Hello from iOS!"
        )
    }
}

private extension TestModule {
    enum Event: String, CaseIterable {
        case logReactNativeMessage = "LOG_REACT_NATIVE_MESSAGE"
    }
}
And that should be it, you now have a native module that communicates both ways between React Native and native.
Android
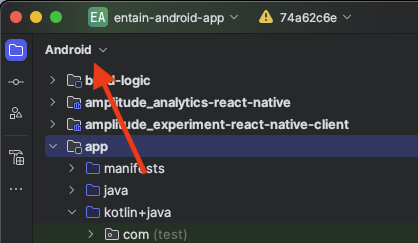
- Open the project in Android Studio and make sure you have
Androidselected as the Project View, which is done via the dropdown in the below image. With that selected expandapp/kotlin+java/com.entaingroup.mobile/plugins.
- Right click
pluginsand selectNew>Package.
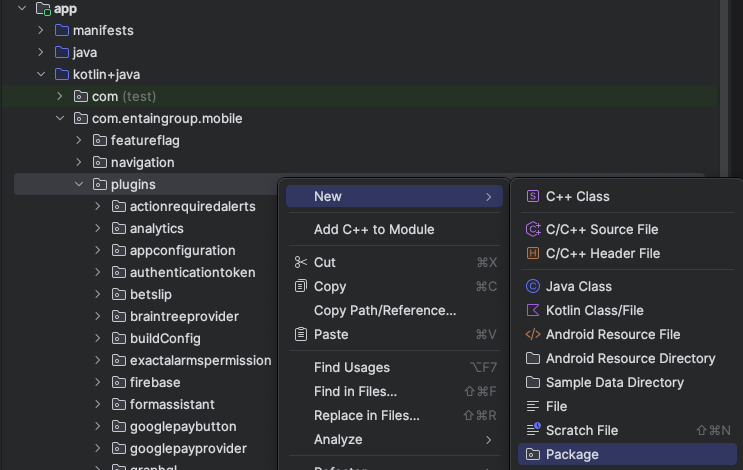
Enter the package name into the prompt, it should match your module name. For example if you're creating a
TestModuleyou will name ittestmodule.Right click your newly created folder, click
New>Kotlin Class/Fileand enter the name. Following the above example, it would beTestModule.Add the following content to the file:
package com.entaingroup.mobile.plugins.testmodule // check the package name is in the following format 'package com.entaingroup.mobile.plugins.<thePackageNameYouEnteredInThirdStep>'

import android.util.Log
import com.entaingroup.mobile.common.kotlin.coroutines.ApplicationScope
import com.facebook.react.bridge.ReactApplicationContext
import com.facebook.react.bridge.ReactContextBaseJavaModule
import com.facebook.react.bridge.ReactMethod
import com.facebook.react.module.annotations.ReactModule
import kotlinx.coroutines.CoroutineScope
import javax.inject.Inject
import javax.inject.Singleton

@Singleton
@ReactModule(name = TestModule.MODULE_NAME)
class TestModule @Inject constructor(
  var reactContext: ReactApplicationContext,
  @ApplicationScope private val appScope: CoroutineScope,
) : ReactContextBaseJavaModule(reactContext) {}
- Kotlin native modules need to implement the
getName()method which returns a string representation of the native module name which is then used in RN to access it via theNativeModulesAPI. To do this we create acompanionobject within the class which declares the name, then use that with thegetNamemethod.
package com.entaingroup.mobile.plugins.testmodule

import android.util.Log
import com.entaingroup.mobile.common.kotlin.coroutines.ApplicationScope
import com.facebook.react.bridge.ReactApplicationContext
import com.facebook.react.bridge.ReactContextBaseJavaModule
import com.facebook.react.bridge.ReactMethod
import com.facebook.react.module.annotations.ReactModule
import kotlinx.coroutines.CoroutineScope
import javax.inject.Inject
import javax.inject.Singleton

@Singleton
@ReactModule(name = TestModule.MODULE_NAME)
class TestModule @Inject constructor(
  var reactContext: ReactApplicationContext,
  @ApplicationScope private val appScope: CoroutineScope,
) : ReactContextBaseJavaModule(reactContext) {
  override fun getName() = MODULE_NAME

  companion object {
    const val MODULE_NAME = "TestModule"
  }
}
This would allow you to access the module in RN with:
const {TestModule} = ReactNative.NativeModules;
- Implement your native methods. To create a method you can call from React Native mark it with
@ReactMethod.
class TestModule @Inject constructor(
  var reactContext: ReactApplicationContext,
  @ApplicationScope private val appScope: CoroutineScope,
) : ReactContextBaseJavaModule(reactContext) {
  override fun getName() = MODULE_NAME

  @ReactMethod
  fun logMessage(message: String) {
    Log.d(MODULE_NAME, "React Native called: $message")
  }

  companion object {
    const val MODULE_NAME = "TestModule"
  }
}
Register the module with React Native. During initialisation, React Native will loop over all packages, and for each
ReactPackage, register each native module within. Inside the same folder you created your module, create a new Kotlin class with the prefixPackage, e.g. for our example it would beTestPackage.Inside your new file, add the following content:
package com.entaingroup.mobile.plugins.testmodule // check the package name is in the following format 'package com.entaingroup.mobile.plugins.<thePackageNameYouEnteredInThirdStep>'

import com.facebook.react.ReactPackage
import com.facebook.react.bridge.NativeModule
import com.facebook.react.bridge.ReactApplicationContext
import com.facebook.react.uimanager.ViewManager
import javax.inject.Inject

class TestPackage @Inject constructor(
  private val testModule: TestModule,
) : ReactPackage {
  override fun createNativeModules(reactContext: ReactApplicationContext): List<NativeModule> =
    listOf(
      testModule.apply { this.reactContext = reactContext },
    )

  override fun createViewManagers(reactContext: ReactApplicationContext): List<ViewManager<*, *>> = emptyList()
}
This file imports the native module you created, TestModule. It then instantiates TestModule within the createNativeModules() function and returns it as a list of NativeModules to register. This also sets up the module with the injected dependencies it may need via @Inject.
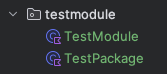
At this point your newly created module folder should look like this (but with the correct name):
- Add the newly created module to
getPackages()insideEntainApplication.kt.
import com.entaingroup.mobile.plugins.testmodule.TestPackage // add your import

...

// add the package to the list of them in the class
abstract var testPackage: TestPackage

// scroll down to here and add your package to register it
override fun getPackages(): List<ReactPackage> =
    PackageList(this).packages.apply {
        add(testPackage)
}
- Scroll down to the
@HiltAndroidAppannotation, and add your module. This is where any app dependencies will be injected for use in your module.
@Inject
override lateinit var testPackage: TestPackage
Finally, replicate those changes toyou just made in
EntainApplication.ktinsideEntainTestApplication.kt.Done. Your module should now be accessible from React Native via the
NativeModulesAPI.
Emitting events in Android
TODO
React Native
Once you've created your module in each of the native repos, you can then consume it via React Native.
Where to create the module in React Native largely depends on what it does and where it's used, but generally native modules are placed in app/modules/native which is what we'll use in this example.
Similar to the native files, it's recommended you reference existing native modules for a good idea of how to implement them.
Create your native module file e.g.
app/modules/native/test-module/test-module.ts.Define your types and use the
getNativeModulehelper to access your native module.
import { NativeModule } from 'react-native';

import { getNativeModule } from '@app/modules/native/utils/getNativeModule';

interface TestModuleType extends NativeModule {
    logMessage(message: string): void;
}

export const TestModule = getNativeModule<TestModuleType>('TestModule');
You can now use your newly created native module.
Subscribing to events in React Native
Event emitters are used to pass data from native to React Native, and so whenever this is required we can use the NativeEventEmitter API to listen to events.
- Define your event emitter in your module file.
import { NativeModule, NativeEventEmitter } from 'react-native';

import { getNativeModule } from '@app/modules/native/utils/getNativeModule';

interface TestModuleType extends NativeModule {
    logMessage(message: string): void;
}

const TestModule = getNativeModule<TestModuleType>('TestModule');

const TestModuleEventEmitter = new NativeEventEmitter(TestModule);

export const NativeTestModule = {
    EventEmitter: TestModuleEventEmitter,
    logMessage: (message: string): void => TestModule.logMessage(message)
}
- Subscribe to events using the keys you defined natively.
export function TestModuleHooks() {
    useEffect(function subscribeToEvents() {
        const eventListener = NativeTestModule.EventEmitter.addListener('LOG_REACT_NATIVE_MESSAGE', (message: string) => {
            console.log(authToken);
        });

        // Removes the listener once unmounted
        return () => {
            eventListener?.remove();
        };
    }, [])
}
You should now be setup to receive events from native and handle the data.