First Time Setup
Getting Started 🐎
You will need to follow the below guide to set up your work computer to be able to build and run the native apps, whether you are looking to contribute to their development, or just trying to run them locally for testing purposes.
Please note that this guide assumes that you are setting up your machine from scratch, and not using something like Migration Assistant (for Macs). Be aware that any previous files you may have had, may impact configuration for any of the below mentioned software, and you may need to take some extra steps of your own to either reset things or work around that.
Let's not jump to conclusions!
If something suddenly doesn't make sense while you are following the steps of this guide, please keep reading through the guide. If something doesn't immediately make sense, you may have not read through the part that may explain the very thing you're confused about yet.
If after reading every sub-section of the part of the setup guide you are on, you still find yourself confused, then reach out to the #dev-setup channel and post a question. If nobody answers you there, try #chapter-native-apps channel in Slack, afterwards.
React Native Development Environment 📱
React Native has official documentation for helping you set up your development environment.
Our First Time Setup guide will try and cover all the steps you need to take to install all the toolchain software that you'll need to start doing development on the Native Apps project.
Please note that there are some differences between the official React Native environment setup guide and our setup guide.
You should follow this guide, first, and if you get stuck or find that information is missing, cross-reference the official environment setup guide.
If after looking at the official guide and other relevant software documentation you are still stuck, or are unsure, post a message in either the #dev-setup or #chapter-native-apps slack channels with:
- The part of the first time setup you're stuck on
- Any error messages or logs (if it's a log, add it to Slack as a text-snippet, via the
+button in the message box) - What steps you've already taken to try resolving the problem, and any resources you've looked at.
Mac Setup 🍎
Please note that this guide is tailored specifically for development on a MacOS machine, and will not cover any other operating systems. Some of the steps are transferable to other operating systems, but you will need to do your own research and troubleshooting.
Required software 📚
Here's a list of all the software you'll need to have installed to be able to develop both the iOS and Android versions of our Native Apps, on a Mac. We'll go through how to install it all, step-by-step, in the next sections.
- macOS [latest]
- Homebrew [latest]
- Watchman [latest]
- Xcode and Xcode Commandline Tools [latest]
asdfruntime/toolchain manager, to manage the installation of: (See.tool-versionsfor versions used by the project)- Node.js v16.10.0 and Node Package Manager v7.24.0 (which comes bundled with that version of Node automatically)
- Yarn v1.22.19
- Ruby v3.3.0
- Java Development Kit (JDK) temurin-17.0.4+101 (Note: This may not be required as you can use the JDK packaged with Android Studio)
- Bundler [latest]
- Android Studio [latest] (See
libs.versions.tomlfor version used by thhe project)- Android 14.0 (UpsideDownCake) [current]
- Android API 34 [current]
- Android 8.0 (Oreo) [minimum supported]
- Android API 26 [minimum supported]
- Android 14.0 (UpsideDownCake) [current]
- Microsoft Visual Studio Code (VSCode) [latest]
- Git Version Control System (
git) [auto-updated via system software updates]- This will get installed when you install Xcode Commandline Tools
If you notice any discrepancies between versions listed here and in the project, alert someone in #chapter-native-apps or feel free to update the documentation yourself.
macOS 💻
Your machine should come with the latest version of the operating system installed, and macs are by default set to auto-update all their system software.
Warning about adopting major macOS and Xcode updates early [Nightmare Mode] ⚠️
You may want to go into the Software Update settings and actually disable automatic downloads of updates, as macOS and Xcode updates (which are usually bundled with the latest version of iOS) tend to be huge, and may sometimes contain breaking changes that could stop you from being able to do your dev work.
- To do this, you should click on the Apple logo in the very top-left corner of the Mac OS menu bar, and then select About This Mac, then press the Software Update button.
- When the Software Update window opens, un-check the "Automatically keep my Mac up-to-date" option, and then press the Advanced button.
- In the modal that opens up, un-check the "Download new updates when available" option, which will also disable "Install macOS Updates" and "Install app updates from the App Store", but ensure that "Check for updates" and "Install system data files and security updates" are still checked, and enabled.
- Periodically look at what updates come up, install any important security updates right away, and monitor our various dev related Slack channels for mentions about potentially breaking changes with new updates, or ask if anyone has updated Xcode without any issues before updating.
⚠️ M1 Mac users
As of Nov/2021 the Facebook's React Native team hasn't yet come up with an official, updated guide on setting up React Native development in Apple Silicon macs. That means if you're doing this for the first time you might come across several different articles & guides, and most of the time they'll conflict with one another.
For that reason, if you already tried setting up your Apple Silicon Mac with other tutorials available online we would like to kindly ask you to uninstall your node / ruby / homebrew stack and follow this guide instead.
Our ideal Apple Silicon setup can be summarised in:
- Not using Rosetta to run any of the tools used for React Native development.
- Not using the default Ruby version that comes installed with MacOS.
- Not installing the JDK recommended by the official React Native environment setup documentation, as it's not compiled for arm64 processors.
Homebrew 🍺
Homebrew is a software package manager for macOS, that allows you to easily download and keep up to date many different software tools and libraries, and is required for our project.
To install it, follow the instruction at https://brew.sh/
Whilst Homebrew is being installed, you will see a message saying "The XCode Command Line Tools will be installed." Press the Enter key to install these tools, as we will need them later.
If the installation was successful:
If you are on a Mac with an Intel CPU - you should be done and can move onto the next step.
If you are on an Mac with an Apple Silicon CPU, you will see a message in the terminal saying "Run these two commands in your terminal to add Homebrew to your PATH:". Skip these commands.
Running them will add the following script to a ~/.zprofile file that will be auto-created in your home directory on your macOS.
eval "$(/opt/homebrew/bin/brew shellenv)"
We don't want to add this script to ~/.zprofile as that will only load brew when you first login, using a login shell, instead of having brew loaded whenever you open a new interactive shell. For this, we want to have this script saved in the ~/.zshrc file instead.
Run the following command echo 'eval "$(/opt/homebrew/bin/brew shellenv)"' >> ~/.zshrc in your terminal.
This will create a .zshrc file if you don't already have one, and append the eval "$(/opt/homebrew/bin/brew shellenv)" bash script to your the file.
You can check that the script was successfully written to the file by running open ~/.zshrc.
To check that Homebrew is installed, and available, run brew doctor in a new terminal instance. If the everything has installed successfully, you will see the following message:
Your system is ready to brew.
Now you can install and update many other utilities and toolchain software, including some you will need for this project.
A note on macOS shells and shell profiles ➡️
macOS comes with both the Bourne Again Shell (bash) and ZShell (zsh) shells, however going forward zsh will be the macOS default, and our docs will primarily cater to using it for any dev environment and software setup and configuration.
See Apple's own support article on the macOS shells and how to set the default one for your machine.
When it comes to using a profile, each shell can use several different profile files, that will have different behaviours - so where you put your shells scripts, matters. You can read more about how the different shell profile files work and in what order they are loaded, here.
For our project, we recommend that you either stick to only only one shell profile file, depending on the shell you will be using.
From the linked article above:
For bash, put stuff in ~/.bashrc, and make ~/.bash_profile source it.
# in ~/.bashrc

# All your shell configs go here...
# in ~/.bash_profile (if you have created it or it already exists)
source ~/.bashrc
For zsh, put stuff in ~/.zshrc, which is always executed.
# in ~/.zshrc

# All your shell configs go here, no need to source this inside of ~/.zprofile, or create that file
If you feel confident you know what you're doing, feel free to use the other files for specific config where appropriate (e.g. ~/.bash_profile for things that are only to be loaded when you use the login shell, etc.
Watchman 👀
Watchman is a tool made by Facebook that watches changes to our code and allows us to trigger actions when those changes are detected, such as refreshing the app so you can see the changes you make, while coding.
To install it, we can simply run brew install watchman in a terminal window.
Once installed, you can check that everything is fine by running watchman --version, and should see a printout of a version:
developer.developerson@macbook ~ % watchman --version
2022.03.21.00
Git and Downloading the Native Apps project to your machine 👉
Git Version Control System, or git, is the tool we use to manage changes to the project code we all work on together, by creating and collaborating different versions of it through a process called "branching and merging". You can learn more about it here.
We will be using git to:
- Download our project's code, the repository, to your local machine, via
git clone. - "Checking out" a particular "branch" (or version) of the code we want to work on, via
git checkout. - Creating our own "branch" from one of the other branches of the code base, the primary one being called
main, viagit branch. - Saving or "committing" any changes we make to our local branch, via
git commit. - "Pushing" our saved changes, up to the "upstream" repository, the one that is on our servers, in Gitlab, via
git push, and - Creating a "merge request", which allows our colleagues to review our code, check for errors, make suggestions, and forms the main approval process for getting our changes "merged" together with the
mainbranch that we originally created our own working branch from, to deploy the code for testing and production.
There other things we can and will be using git for, but there are covered more in the Code Contributing Guide, later on, in another page.
To check that git is installed correctly, run git --version in your terminal. You should see something like this:
git --version
git version 2.32.0 (Apple Git-132)
Note, macOS comes with it's own version of git, bundled with the Xcode Commandline Tools, that is automatically updated when those tools are also updated. You can install more recent or different versions of git in other ways, but unless you have a specific reason for doing so, it is not recommended.
Setting up access to our repository and cloning the project code to your machine
Now that git is available, you should run touch ~/.gitconfig in your terminal. This will create a new .gitconfig file in your home directory, where we will need to set some project-specific settings. To open the file you just created, run open ~/.gitconfig in your terminal, and this will open the file in the TextEdit app by default, unless you've set some other file to be your default text editor already.
In the file, paste this template text:
[user] # the name and email that will be logged when you make a commit
    name = <FIRST_NAME>.<LAST_NAME>
    email = <FIRST_NAME>.<LAST_NAME>@neds.com
[credential] # Store your SSH key in macOS's Keychain
    helper = osxkeychain
[url "[email protected]:"]
    insteadOf = https://git.neds.sh/

# HELPFUL NOTES
# Check this link for instructions on obtaining your Gitlab auth token for the above:
# https://native-apps.neds.sh/docs/wiki/new-starters-guide/first-time-setup#setting-up-access-to-our-repository-and-cloning-the-project-code-to-your-machine

# There are many more gitconfig options you can set, see https://git-scm.com/docs/git-config.
# You don't need to keep this comment section in your actual `.gitconfig` file, it's just here to help.
Replace the following template sections:
<FIRST_NAME>with your first name (e.g. Developer)<LAST_NAME>with your last/family name (e.g. Developerson)- For your
email, you can also use your@entaingroup.com.auaddress, but be sure that it is verified in your GitLab profile preferences, under the Email section.
You will need to have an SSH Key to be able to use git with our code repository, on our self-hosted instance of Gitlab.
This key will be used to download and upload any code changes, and otherwise work on our code repositories here at Entain.
To create a new SSH Key, go to this page on our self-hosted Gitlab website and press the 'Add New key'.
You will need to fill out the following details:
- Create a Title for your key (e.g.
.gitconfigorentain-native-apps)- This will help you identify it in Gitlab if you need to have multiple SSH keys on your account.
- Usage type can be either 'Authentication' or 'Authentication & Signing'.
- Note that we currently don't sign our commits.
- Set an expiration date, which should be just under a year from the creation date - the interface will warn you if you've picked an incorrect date.
You will then need to actually add the SSH PUBLIC key to the 'Key' field. If you've never created an SSH key before, follow the documentation link on the screen which will take you through all the steps you need to create a private and public key pair on your machine. You will then need to copy and paste the PUBLIC key into the 'Key' text box.
Once you've filled out all of the above, press Add Key and you should now be able to use git to fetch and push whatever repositories you have access to on our Gitlab!
Cloning the Native Apps repo to your machine
Now that you have the git permissions set up, you should download a copy of our project repository to your local machine, so you can work on the code.
In a terminal window, run the following command to clone the project code "repo" to your machine.
- Note: this will download the code in a folder named
react-nativeat the directory where your terminal is open.
git clone [email protected]:technology/code/ui/react-native.git
- Note: Please use SSH (as shown above) to clone the repo over HTTPS.
If you want to clone the repo to a specific directory, you can give a path to that directory like this:
git clone [email protected]:technology/code/ui/react-native.git /Users/developer.developerson/Documents/Repos/react-native
Tip: to print the path of the current directory you're at, in your terminal, run the pwd command.
developer.developerson@macbook ~ % pwd
/Users/developer.developerson/Documents/
After running git clone, you should see the download start successfully is you've set up the access token correctly
developer.developerson@macbook ~ % git clone [email protected]:technology/code/ui/react-native.git /Users/developer.developerson/Documents/react-native
Cloning into 'react-native'...
remote: Enumerating objects: 128635, done.
remote: Counting objects: 100% (1808/1808), done.
remote: Compressing objects: 100% (130/130), done.
remote: Total 128635 (delta 1764), reused 1678 (delta 1678), pack-reused 126827
Receiving objects: 100% (128635/128635), 92.00 MiB | 3.65 MiB/s, done.
Resolving deltas: 100% (100068/100068), done.
Now you should be able to go into your newly downloaded project directory like so:
developer.developerson@macbook ~ % cd Documents/Repos/react-native
developer.developerson@macbook react-native %
Troubleshooting: If you run git remote -v, you should see the below:
developer.developerson@macbook ~ % git remote -v
origin  [email protected]:technology/code/ui/react-native.git (fetch)
origin  [email protected]:technology/code/ui/react-native.git (push)
If instead the repo URLs are prefixed with https:// it means you've cloned with HTTPS rather than SSH. So you will need to re-clone ensuring you use the ssh URL or reset the remote origin URL by the below:
developer.developerson@macbook ~ % git remote set-url origin [email protected]:technology/code/ui/react-native.git
Creating a Personal Access Token to download our internal software packages
You will also need to have a Personal Access Token. This token will be used to download new versions, upload changes, and otherwise work on our code here at Entain.
To create a new token, go to this page and fill out the following details:
- Select a Token name (e.g.
.gitconfig) - Set an expiration date for the token of at most 1 year from the current date
- Select/check the "api" box under Select scopes. You should not check any other scopes.
- Press the "Create personal access token" button.

This will refresh the window, and you will see a new field on the same page, with your new personal access token.
Copy this value, and paste it into your ~/.zshrc file, which is used to set up and load your Shell environment on your development machine, like so:
# Access Token
export GITLAB_REGISTRY_AUTH_TOKEN="<YOUR_PERSONAL_ACCESS_TOKEN>"
Replace the <YOUR_PERSONAL_ACCESS_TOKEN> with the actual token, and make sure it is surrounded by double quotes ("") as above.
You can save this exported GITLAB_REGISTRY_AUTH_TOKEN value anywhere in your shell profile, but make sure that it is that exact name and not something else, as our Node package manager tooling we will be using soon will look for that specificly named environment variable.
asdf runtime/toolchain manager
Previously, we used to use a combination of nvm, rbenv, SDKman and others to manage our local node, ruby and java/jdk runtimes for the project.
Thanks to asdf we can now manage all of these runtimes with only a single CLI tool, simply by listing each supported runtime or tool and its required version in a single .tool-versions file.
Install asdf's dependencies
asdf primarily requires coreutils, git & curl to be installed before you can install and configure asdf.
You should already have git installed and working from the previous step, so you should only need to run:
brew install coreutils curl
Install asdf
The official method is very simple, and will clone the stable release of asdf to location ~/.asdf/ on your machine.
git clone https://github.com/asdf-vm/asdf.git ~/.asdf --branch v0.14.0
Integrate asdf into your shell environment
ZSH Users with `oh-my-zsh`
plugins=(asdf)
This will handle integration with your PATH as well as support for completions.
ZSH Users without `oh-my-zsh`
. "$HOME/.asdf/asdf.sh"
If you want to configure completions, also add the following:
# append completions to fpath
fpath=(${ASDF_DIR}/completions $fpath)
# initialise completions with ZSH's compinit
autoload -Uz compinit && compinit
Bash Users
. "$HOME/.asdf/asdf.sh"
If you want to configure completions, also add the following:
. "$HOME/.asdf/completions/asdf.bash"
Install asdf plugins for Node.js ⚡, Yarn 🧶, Ruby 💎 and Java JDK ☕
To install all of the correct versions of each runtime environment to your local machine, we will be using asdf which you've just installed.
Some of the asdf plugins we use have system-level dependencies which can all be installed via Homebrew with a single command:
brew install gpg gawk openssl@3 readline libyaml gmp unzip
Next, you will install the four asdf plugins which will help us to handle the installation and management of specific versions of these runtimes:
asdf plugin add nodejs https://github.com/asdf-vm/asdf-nodejs.git
asdf plugin add yarn https://github.com/twuni/asdf-yarn.git
asdf plugin add ruby https://github.com/asdf-vm/asdf-ruby.git
asdf plugin add java https://github.com/halcyon/asdf-java.git
Now that we have the dependencies and plugins installed, we can simply use the asdf install command in any of our projects or repositories that contain a .tool-versions file.
For example, in the Native Apps project, our .tool-versions file looks like this:
nodejs 20.14.0
java adoptopenjdk-17.0.10+7
ruby 3.3.0
yarn 1.22.19
So, you can simply run asdf install in your terminal in the project root
directory, and asdf and its plugins will handle the installation and integration
of these runtimes into your shell's PATH.
After running asdf install, you will have to re-fresh your shell's PATH by
either opening a new terminal window, or running source ~/.zshrc (if you're
using ZSH) or source ~/.bash_profile (if you're using Bash).
You can also run the asdf command asdf reshim to re-generate the shims for all
the plugins you have installed, which will also refresh your shell's PATH.
After running the install and refreshing your shell's PATH, you should now be able to check that the correct versions of each runtime are available in your terminal whilst you're inside the Native Apps project:
developer.developerson@macbook ~ % node -v
v20.14.0

developer.developerson@macbook ~ % yarn -v
4.2.2

developer.developerson@macbook ~ % ruby -v
ruby 3.3.0 (...) [arm64-darwin21]

developer.developerson@macbook ~ % java --version
openjdk 17.0.10 2024-01-16
OpenJDK Runtime Environment Temurin-17.0.10+7 (build 17.0.10+7)
OpenJDK 64-Bit Server VM Temurin-17.0.10+7 (build 17.0.10+7, mixed mode)
You will need to set a global version of Java for your machine, as a default version, to be able to run the Android emulator, and avoid getting a constant warning upon opening a new terminal.
To do this, run asdf global java adoptopenjdk-17.0.10+7 in your terminal.
Alternatively, if you have Android Studio already installed, you can use the packaged JDK by adding the following line to your .zshrc or .bashrc:
export JAVA_HOME="/Applications/Android Studio.app/Contents/jbr/Contents/Home"
The above example uses the default install location for Android Studio on Mac, replace the path in quotes to the path of your Android Studio if it is different.
Installing Node dependencies with Yarn 🧶
Yarn is a package manager for Node.js, and is used to
install all the Node.js dependencies for our project. IF you've followed this
guide so far, you would have already installed it via asdf in the previous
step.
We need to configure our environment for Yarn to use our
GITLAB_REGISTRY_AUTH_TOKEN, which is used to authenticate with our private NPM
registry, to fetch our internal dependencies. You would have created this token
in the prior section where you were setting up your git credentials and cloning
the project
repo.
Open your shell config file (e.g. ~/.zshrc) and add the following line:
# Various Environment Variables
export GITLAB_REGISTRY_AUTH_TOKEN="<Enter your Gitlab auth token here>"
You can add this variable and value anywhere in the file. Just be sure to save
the file after you've added it, and restart your terminal, or run source ~/.zshrc (if you're using ZSH) to refresh your shell's PATH.
Now that Yarn is ready to use, simple run yarn in your terminal, opened inside
of the project's root directory, to install all the Node.js dependencies we need:
developer.developerson@macbook ~ % yarn
yarn install v1.22.19
[1/4] 🔍  Resolving packages...
success Already up-to-date.
✨  Done in 0.07s.
If all has gone well, you should see a new node_modules folder inside of the
project directory, containing all of the Node.js dependencies we need. As we are
using Yarn "Berry" with a hybrid PnP (Plug'n'Play) setup, you will also see a
.yarn/cache
folder containing all of the cached dependencies. This is done to speed up
subsequent installs, and to ensure that all developers are using the same
versions of the dependencies, as well as making our installs more reproducible.
Bundler 🧺
Now that we've taken care of Node dependencies for the JavaScript and TypeScript side of our project, lets install our iOS related dependencies.
All of them will be handled by Bundler, which is a Ruby gem that we use to manage the installation of our Ruby gems and Cocoapods packages.
To install Bundler, we simply run gem install bundler in our terminal where we
are also running Ruby 3.3.0.
developer.developerson@macbook ~ % gem install bundler
Fetching bundler-2.5.11.gem
Successfully installed bundler-2.5.11
Parsing documentation for bundler-2.5.11
Installing ri documentation for bundler-2.5.11
Done installing documentation for bundler after 0 seconds
1 gem installed
You can check that it was installed properly by running bundle -v
developer.developerson@macbook ~ % bundle -v
Bundler version 2.5.11
Now that that's done, any Ruby command you need to run in our project directory, should be prefixed with bundle exec, such as bundle exec pod install, rather than just running pod install directly. This will ensure that Bundler sets the correct version of the Ruby gems and Pods (Cocoapods packages, for iOS development) that we need. The pre-made scripts in our project (found in the package.json) file already do all this for you, so most of the time you shouldn't have to worry about doing this, unless you are running some command manually.
Installing Gem bundles with Bundler 💎 🎁
Bundler is able to install whatever version of Ruby, and Ruby gems we specify by reading a Gemfile in our project directory.
source "https://rubygems.org"

ruby "~>3.3.0"

gem "cocoapods", "1.15.2"
# Needed until https://github.com/CocoaPods/Xcodeproj/pull/942 is merged
gem "xcodeproj", git: "https://github.com/Brett-Best/Xcodeproj.git", branch: "feature/Xcode-16.0-Support"

# When upgrading ensure the CI jobs listed below pass:
# - Build iOS [build flavor/environment] for TestFlight
# - Deploy iOS [build flavor/environment] to TestFlight
# - Build iOS [build flavor/environment] (Native Rebuild) for TestFlight
# - Deploy iOS [build flavor/environment] (Native Rebuild) to TestFlight
gem "fastlane", "2.221.0"
Through this file, we can then install only the Ruby gems that our project needs, and ensure that we are using the right version of Ruby.
We can install the Ruby Gems we just declared in the Gemfile, through Bundler, by using the bundle install command, at the Native Apps project directory.
Note: Bundler will also automatically install any missing gems when we try to use them, so this step should be optional for you. This is possible by setting BUNDLE_AUTO_INSTALL: 1 in the .bundle/config file in our project files.
To install the gems manually, now, open your terminal at the project root folder and run bundle install:
developer.developerson@macbook react-native % bundle install
...
Using bundler 2.5.11
...
Using cocoapods 1.15.2
...
Using fastlane 2.221.0
Bundle complete! 3 Gemfile dependencies, 117 gems now installed.
Bundled gems are installed into `./vendor/bundle`
I've cut down the examples of the command output as many more Ruby gems are installed, but just showing you that Cocoapods and Fastlane are among them!
Also, you'll notice that the version of Bundler being used may be different to the one you have installed - that is fine, as Bundler will download and use whatever version of itself is needed, dependent on the version that was used to create the Gemfile.lock file.
Not running Ruby commands through Bundler ⚠️
WARNING
While you could install any gems or pods for the project manually, such as with pod install or npx pod-install, this is not recommended, as you won't be adhering to the versions set in Bundler's Gemfile where these are set for the whole project.
This would mean that you might install a completely different version, too old or too new, that may have issues with our other code. If you choose to do this, you will have to do your own troubleshooting if any issues crop up.
CocoaPods 🍫 and other Ruby Gems
The React Native Environment Setup guide will mention needing to install the CocoaPods package manager. CocoaPods will be automatically installed when we install our other project Ruby Gems with bundle install - mentioned in the previous step.
To check that cocoapods is installed already, just run pod --version in your terminal, inside of the Native Apps project directory:
developer.developerson@macbook react-native % pod --version
1.15.2
If the command works, and you end up seeing a version number, that means that you didn't follow the guide, as we do not want to manually install Cocoapods without Bundler. Make sure you uninstall cocoapods using whatever method you used previously to install it.
You should instead get an error message saying:
developer.developerson@macbook react-native % pod --version
zsh: command not found: pod
To check that Cocoapods is installed via bundler, in our Native Apps project folder, you'll want to run the same pod command after the bundle exec command. This ensures that you are actually running cocoapods through Bundler itself, like so
developer.developerson@macbook react-native % bundle exec pod --version
1.15.2
If you missed or didn't follow the previous Bundler install step, Bundler will automatically installing cocoapods and other missing gems for you as soon as you try to use them
```terminal
developer.developerson@macbook react-native % bundle exec pod --version
Automatically installing missing gems.
Fetching gem metadata from https://rubygems.org/.......
...
Once CocoaPods is installed, you can run yarn pod which will run Cocoapods for you, and install all the pods you need for our iOS app.
What yarn pod does under the hood is run this command: bundle exec pod install --repo-update --project-directory=ios. This command uses Bundler to run Cocoapods, ensuring the specified version is used, and alerting you to install it if it isn't present (with bundle install). It also updates the gem's own dependencies, and looks for the Podfile in the ios/ directory for you, without you needing to manually cd ios/ into it.
If you are running this for the first time, or have wiped your ios/Pods folder from a previous install, it will take a while. Once it is finished, you should get a message that looks like this:
Pod installation complete! There are 100 dependencies from the Podfile and 111 total pods installed.
Later, when we are building the iOS version of our app, the yarn setup script we run will automatically install all the CocoaPods “pods” that our iOS app needs, through by also running yarn pod for us. If you get an error saying that no pod command was found, it’s likely that you forgot to install the gems via bundle install in the previous step! If that happens, just run bundle install just as the error message suggests.
CocoaPods manages the pod packages the same way that Bundler manages Ruby gems, and Podfile is its configuration file. Here we set various specific versions of CocoaPods packages, and other iOS app configurations that are used by the Xcode IDE when building our app bundle.
Rosetta 2 ⚠️
Sometimes the software we use on our project does not yet support Apple Silicon (ARM Architecture CPUs). As such, Apple has released a tool called Rosetta 2, which allows us to run software that was compiled for Intel CPUs, on our Apple Silicon Macs.
Your macOS may already come with Rosetta pre-installed.
To check, run the following script in a terminal window:
if  [ $(/usr/bin/pgrep oahd >/dev/null 2>&1;echo $?) -eq 0 ]; then
 echo 'Rosetta is installed';
 else
 echo 'Roesetta is not installed';
fi
(We are checking to see if the command
oahd, the internal Apple name for Rosetta 2, is present, indicating that it is installed)If you see
Rosetta is installed, you can move to the next section.If you see
Rosetta is not installed, you will need to install Rosetta 2, by running the following command in a terminal window:softwareupdate --install-rosetta.You may be prompted to enter your system password (the one you use to log into your work MacBook): enter it, and press the "Install Software" button.
Once Rosetta 2 is installed, run the command from the first bullet point to check that it is correctly installed. You should then see the message
Rosetta is installed.
Xcode 📱
Download Xcode from the Mac App Store. Click the "View in Mac App Store" link on the linked page above, to open it in the Mac App Store app on your Mac, and press Download.
If you haven't already, you will need to sign in with an Apple ID account, which you may have already used when setting up your work MacBook Pro laptop.
The download will take a while.
Once downloaded and installed, start Xcode from your Applications in macOS.
If Xcode Commandline Tools haven't been installed, you may be prompted to install "Additional Components". Press "Yes" and let them install. Depending on your macOS version, this should install Xcode Commandline Tools
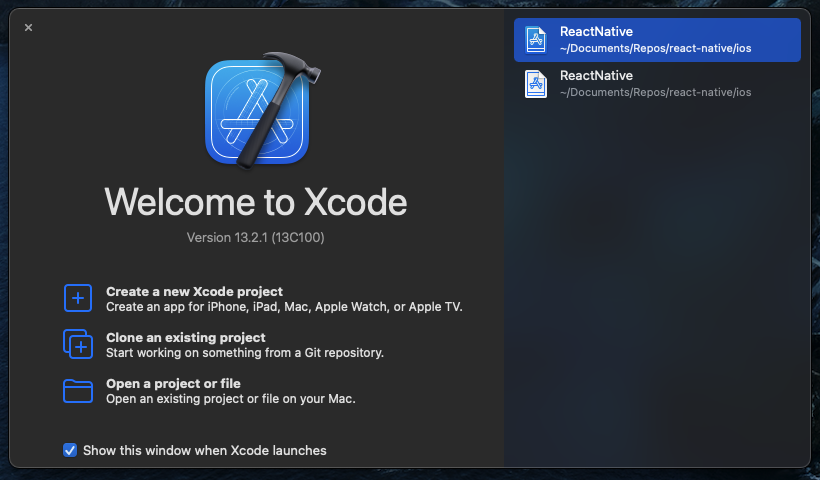
Next, a "Welcome to Xcode" window will open. Select "Open a project or file".
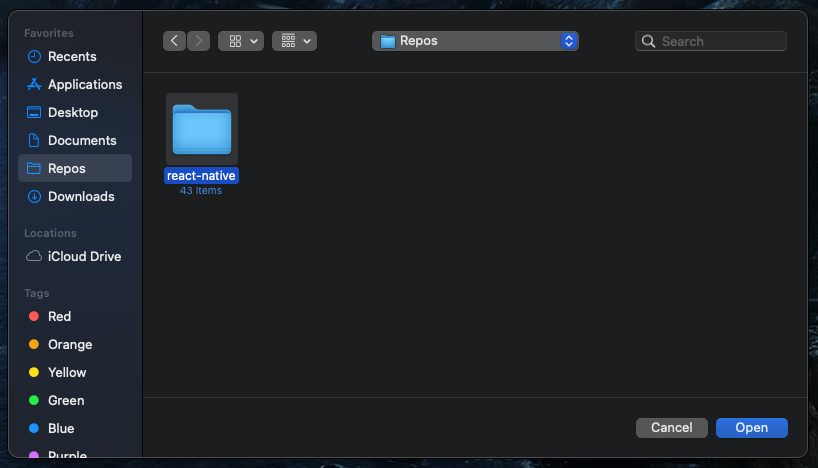
Navigate to the directory where you have git clone'd the project repository.
- Note: this assumes you have followed the previous steps to download our Native Apps project repository onto your machine.
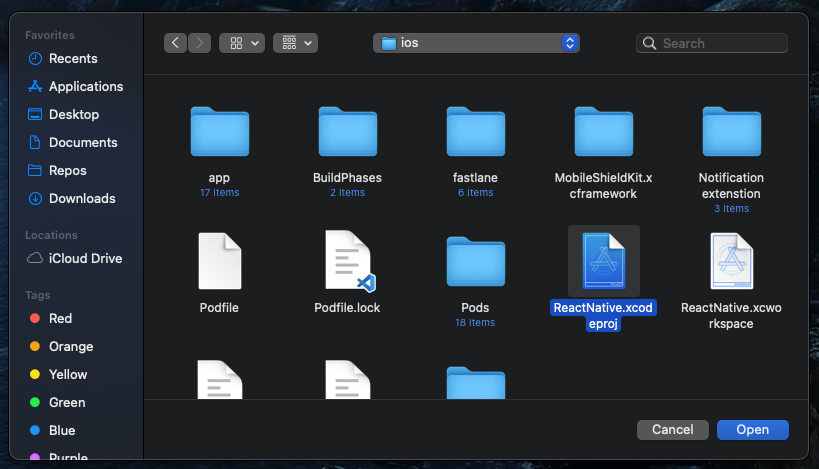
Navigate to the to the react-native/ios and select the ReactNative.xcworkspace file, then press the Open button. Do not select the ReactNative.xcodeproj to open the project in Xcode, as you will run into errors when trying to run the app, due to our project consisting of several different app targets and projects in turn all within one workspace.
This will load the Native Apps project for iOS development in Xcode.

If after installing Xcode, the Xcode Commandline Tools weren't installed yet, you may be prompted to install them.
Press "Yes" and allow the tools to be installed, as you will need them.
Once the Xcode Commandline Tools are installed, click on the Xcode menu in the Mac menu bar, and select Preferences.

Navigate to the Locations tab in the Preferences window. Once there, click on the drop-down field under Command Line Tools and select the available version, e.g. Xcode 13.2.1 (your version may differ, but should match the latest version of Xcode itself).
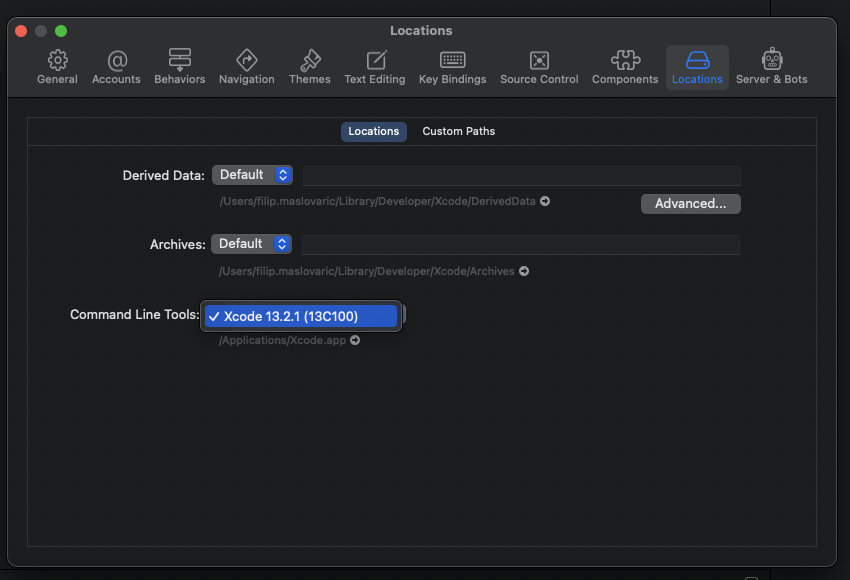
There should be only one choice - if you don't see one, then the commandline tools haven't been installed yet. Retrace the above steps to install it.
Next, will also want to download or make sure at least one version of the iOS Simulator is downloaded, by going to the Components panel also in Preferences.
Note: in newer versions of Xcode, there may be no Components panel in Preferences, but you have to go to Window menu instead, in the top menu and select Devices and Simulators.
If no version has a blue circle with a tick, you will have to choose one to download. Pick the latest version, which should be the first in the list, and the oldest version of iOS available (which as of writing is iOS 12.4) as it is good to test your changes on both the latest and oldest versions to see if there's any bugs that may break the app for customers on older devices.
To download a simulator version, just click once on the down-arrow icon next to the version, e.g. "iOS 15.0 Simulator", and it should start downloading. You may be prompted to enter your system password (the one you use to log into your work MacBook): enter it, and press the "Install Software" button.
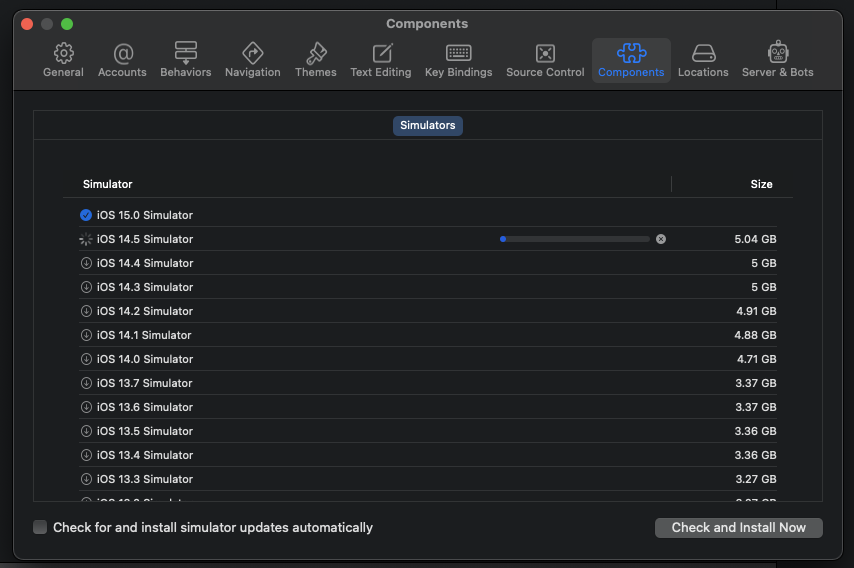
If you've enabled the "Check for and install simulator updates automatically" option, Xcode will download the latest version as soon as it becomes available.
- Note: do not go installing every single version of every OS simulator right away, due to how large each one is, and because there's no obvious way to delete unused ones later.
Xcode Commandline Tools ⚙️
You will need to have these installed in order to use some common tools like git, as well being able to do iOS dev with Xcode and React Native.
There are 3 ways to install the commandline tools:
- via Homebrew, when it is first installed on a Mac
- directly, through a terminal, or when trying to access a commandline tool that would come bundled with the commandline tools
- macOS will prompt you to download them if you try using
giton a newly set up Mac, for example.
- macOS will prompt you to download them if you try using
- by installing Xcode, which you just did above.
If you've followed this guide step-by-step, you should already have Xcode Commandline Tools setup.
To check if they are installed, open a terminal window and run xcode-select -p.
If it's already installed you will see this:
$ xcode-select -p
/Applications/Xcode.app/Contents/Developer
This will show you the path on your system, where the tools are installed.
If the tools still aren't installed, then open your terminal window and type in the following command:
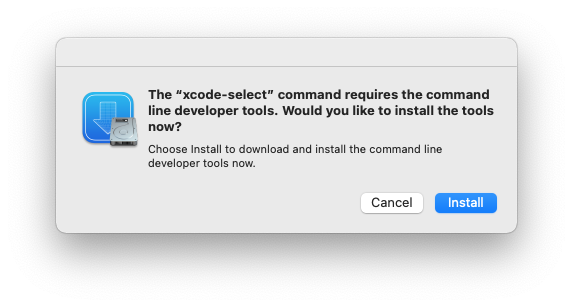
xcode-select --install
This will prompt you to install the Xcode commandline tools in a new window. Press "Yes" and let it download and install.
Once done, you can run the xcode-select -p command again to check if the tools are available and installed at the right path.
That's the end of the Xcode setup.
With Xcode, and Ruby, and Bundler, and Cocoapods installed - we've finished setting our project up for iOS development, and can now move onto setting up things for Android.
Android Studio and Android Software Development Kit (SDK)
Android Studio is the official IDE for developing Android apps (if it looks like an IDE made by JetBrains, it's because it is!). Much like Xcode is the go-to for iOS development, we will be getting and downloading this to easily manage building our Android app locally, though we won't need to do much development work within Android Studio itself, unless it is native Android code we need to write or modify (in Java)*.
- Download Android Studio
- When you click "Download Android Studio", you'll be asked to accept some Terms & Conditions
- Afterwards, the website should detect and show you the appropriate version for your OS to download.
- Once downloaded, install it.
- During the installation wizard you'll be asked which install type you want: Select "Custom".
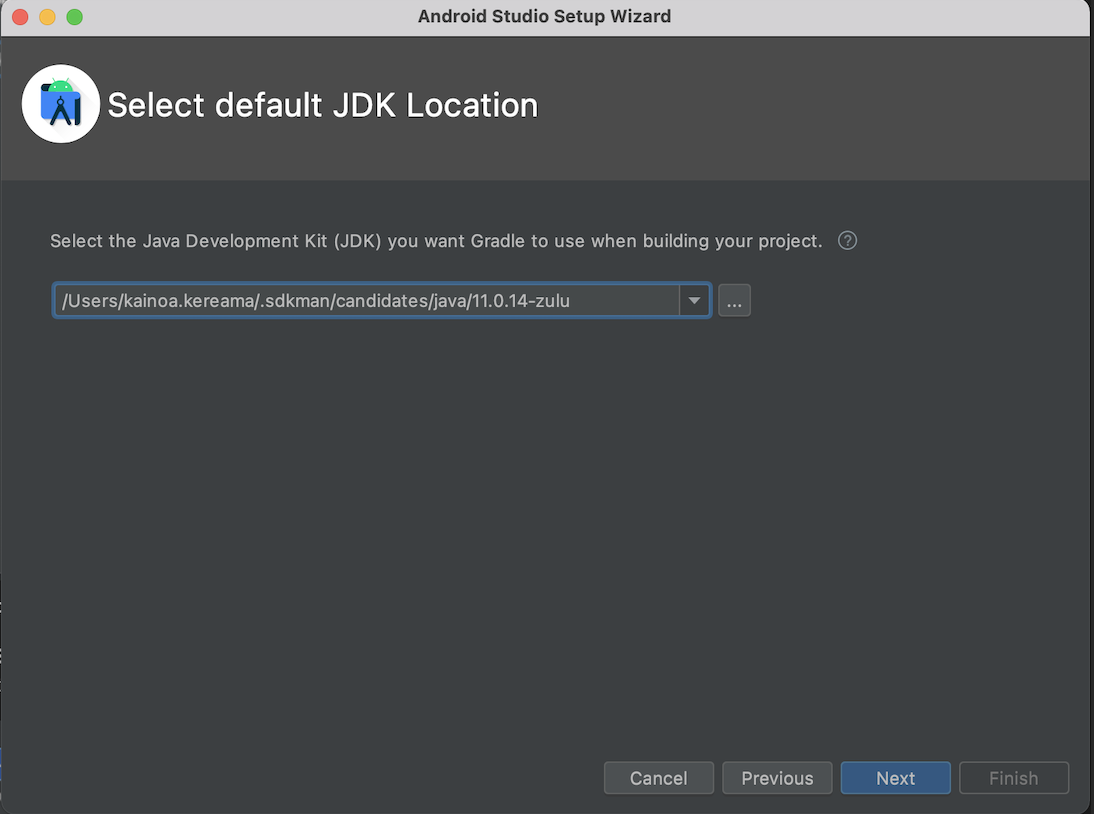
- If you are prompted for the default JDK Location, if you followed the steps
above correctly you should be able to find the arm64 version of the JDK by
running this asdf command:
asdf which java. This will give you the path to the JDK, which you can then copy and paste into the JDK Location field.
Next, you'll be asked to install some Android tool-chain components, like the Android SDK.
Select ONLY Android SDK and Android SDK Platform (they should already be selected). DO NOT install Android Virtual Device - if it's selected automatically, deselect it. Press Next.

ATTENTION!
- DO NOT install "ANDROID VIRTUAL DEVICE".
- DO NOT change the default Android SDK install location.
You will be asked to accept a few licenses, click through and accept all of them, and then press Finish.
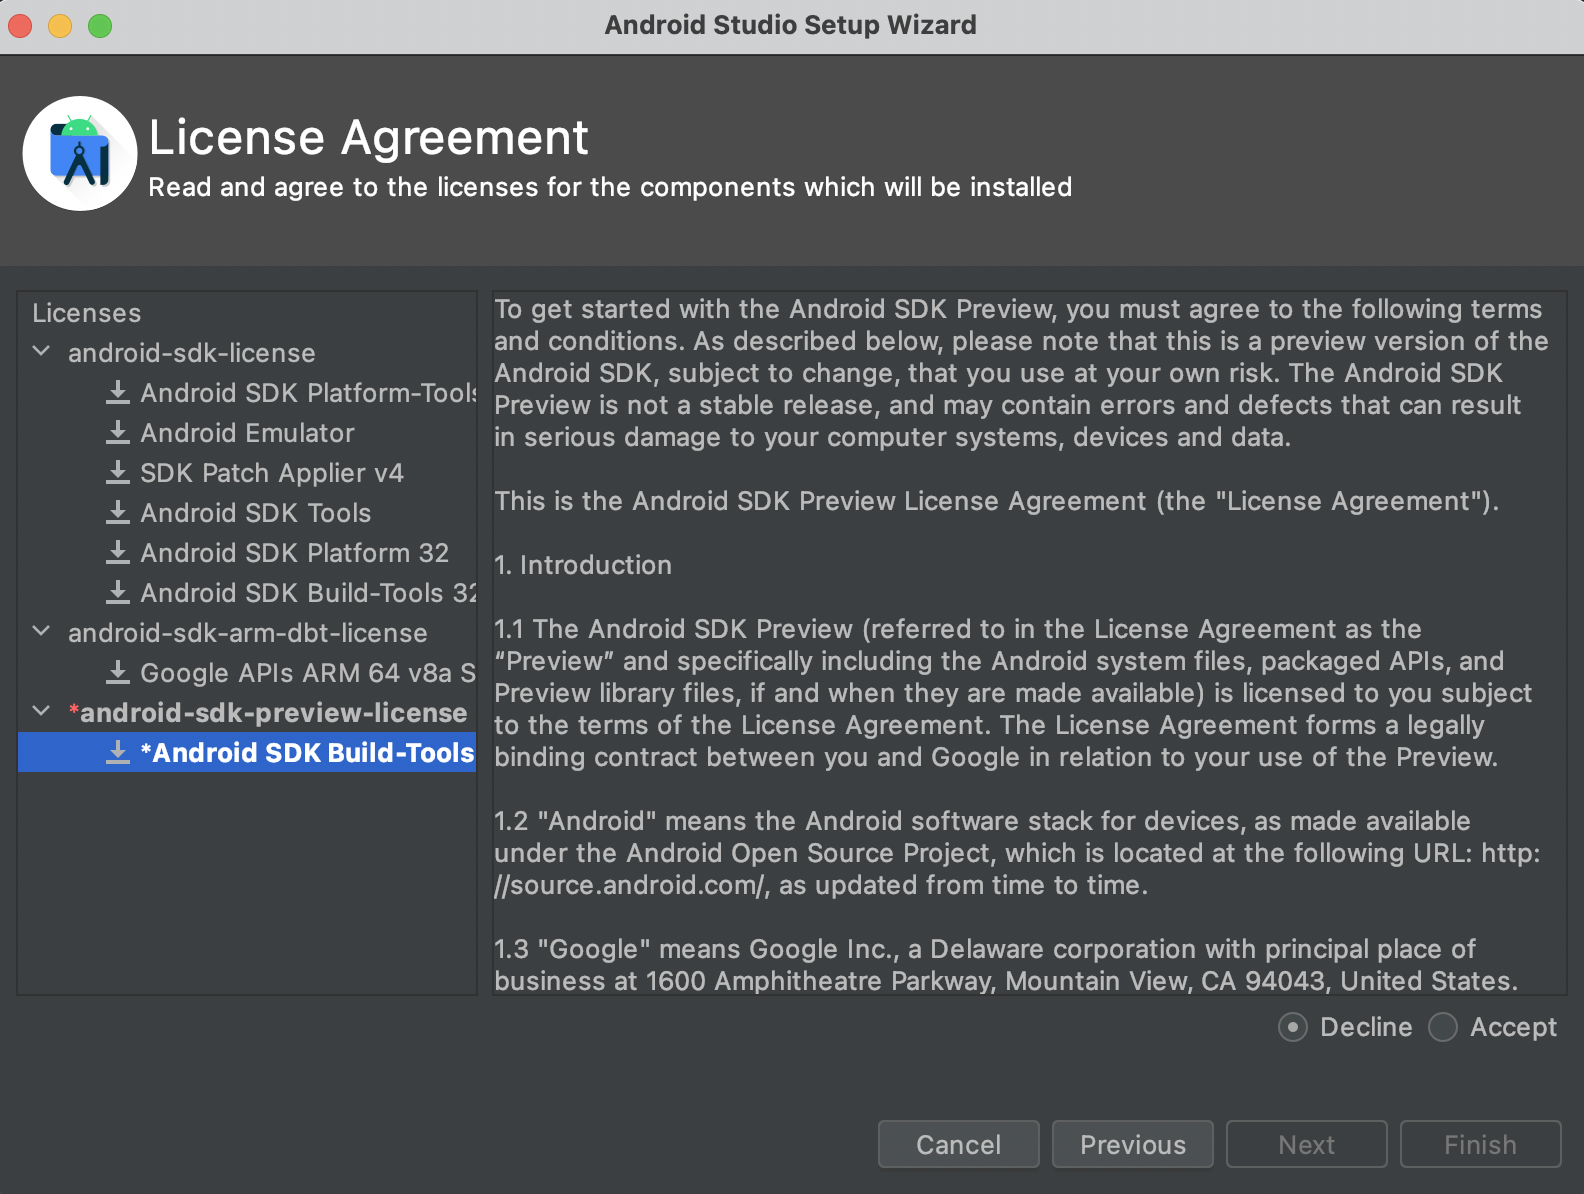
Android Studio should now be downloading and installing all of the Android and Google SDKs and tools it needs for Android development, for you.
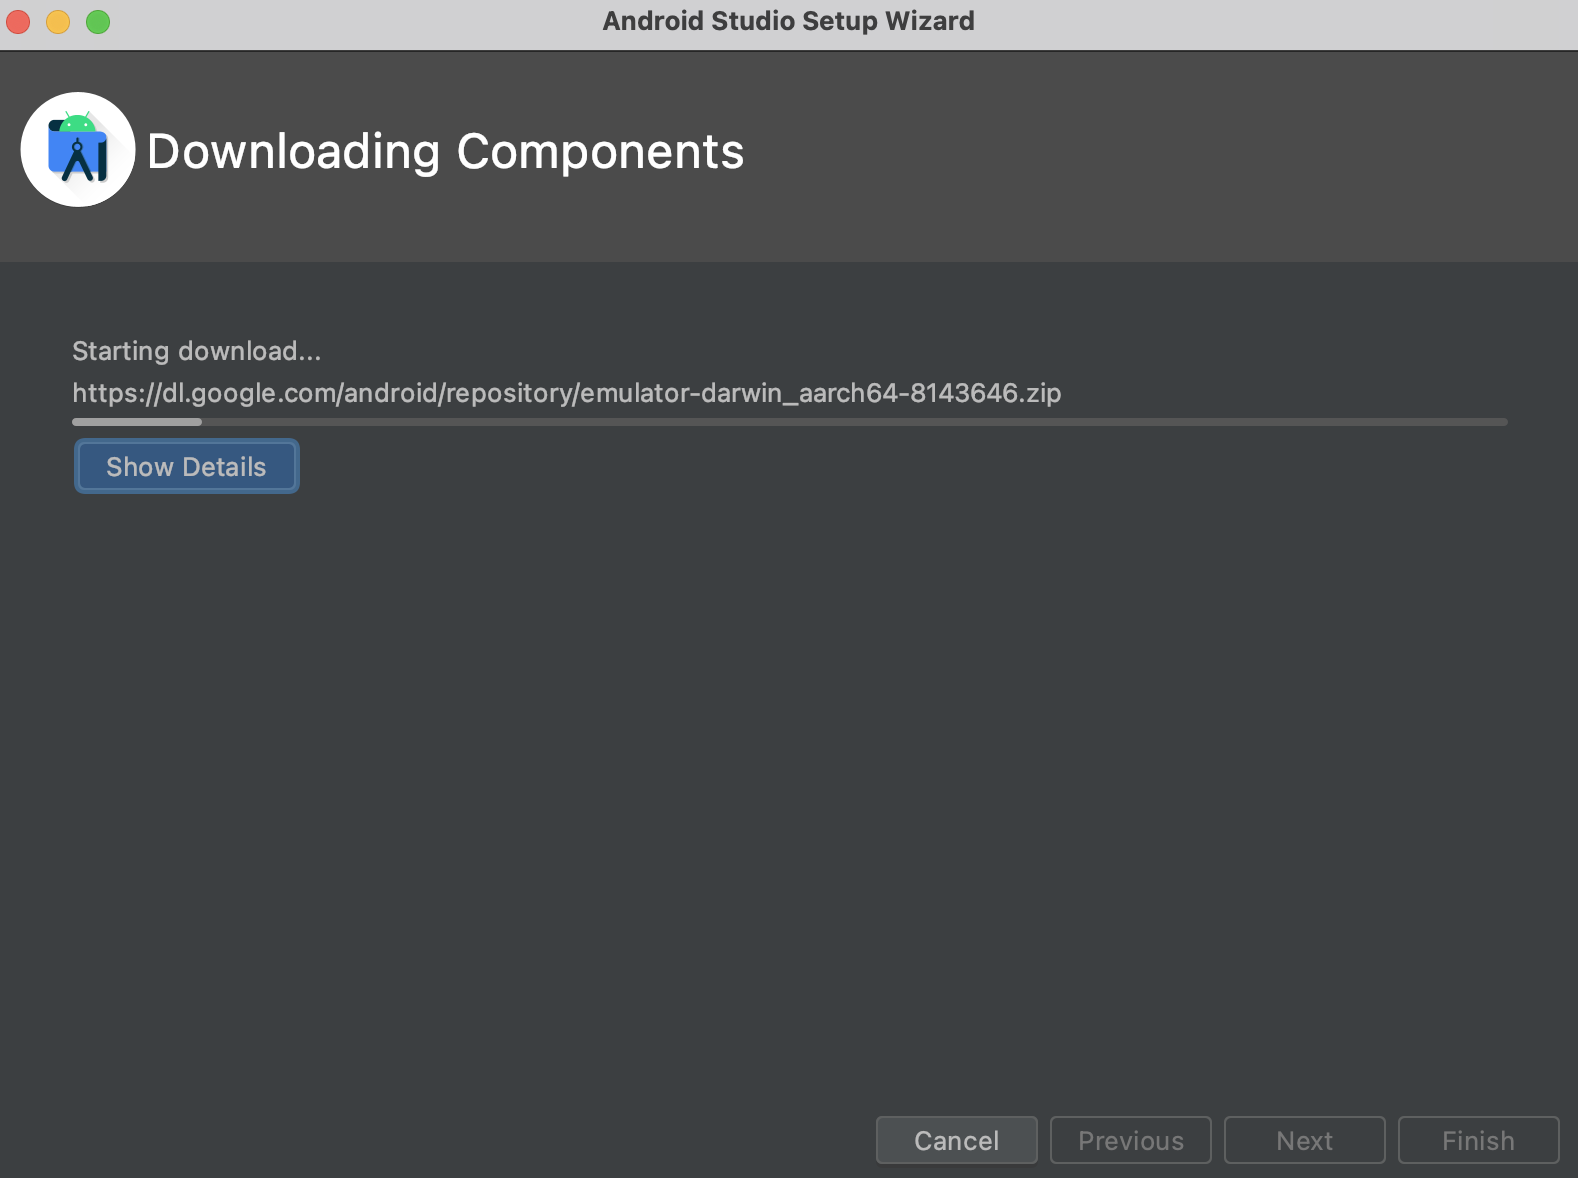
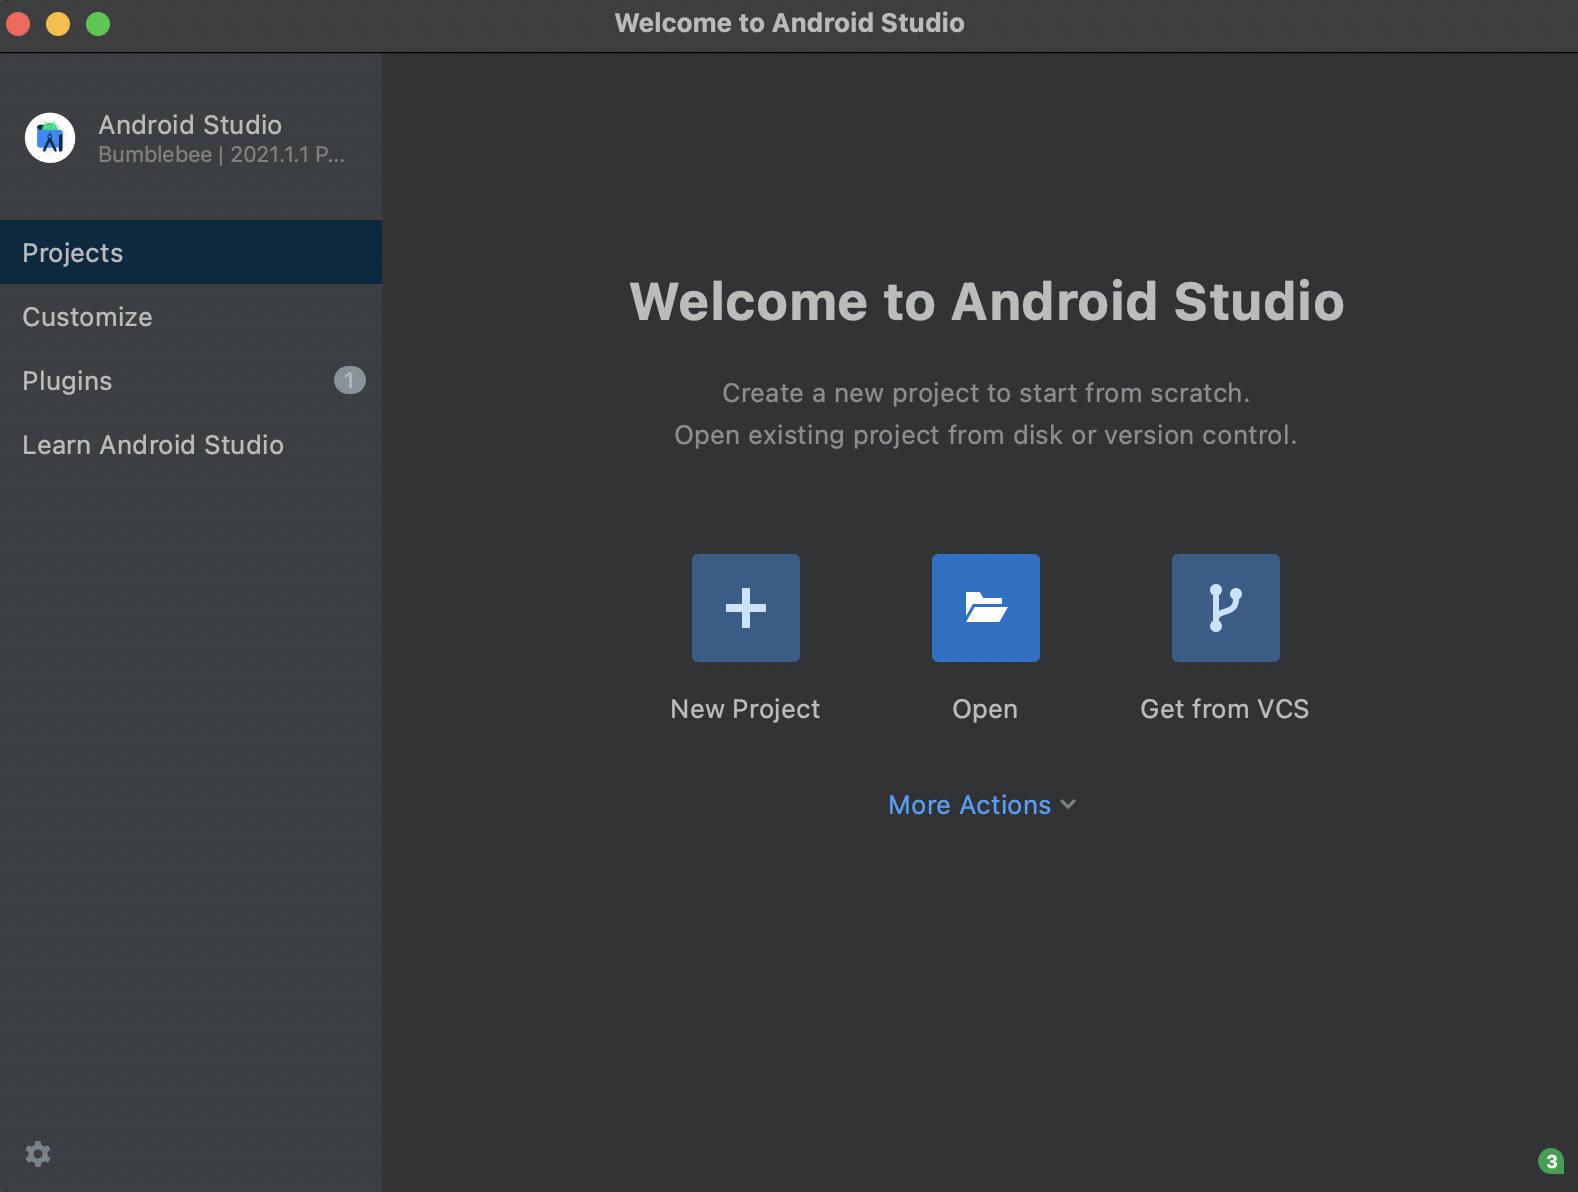
Once it's done, press Finish and you'll be greeted by the Android Studio welcome screen.
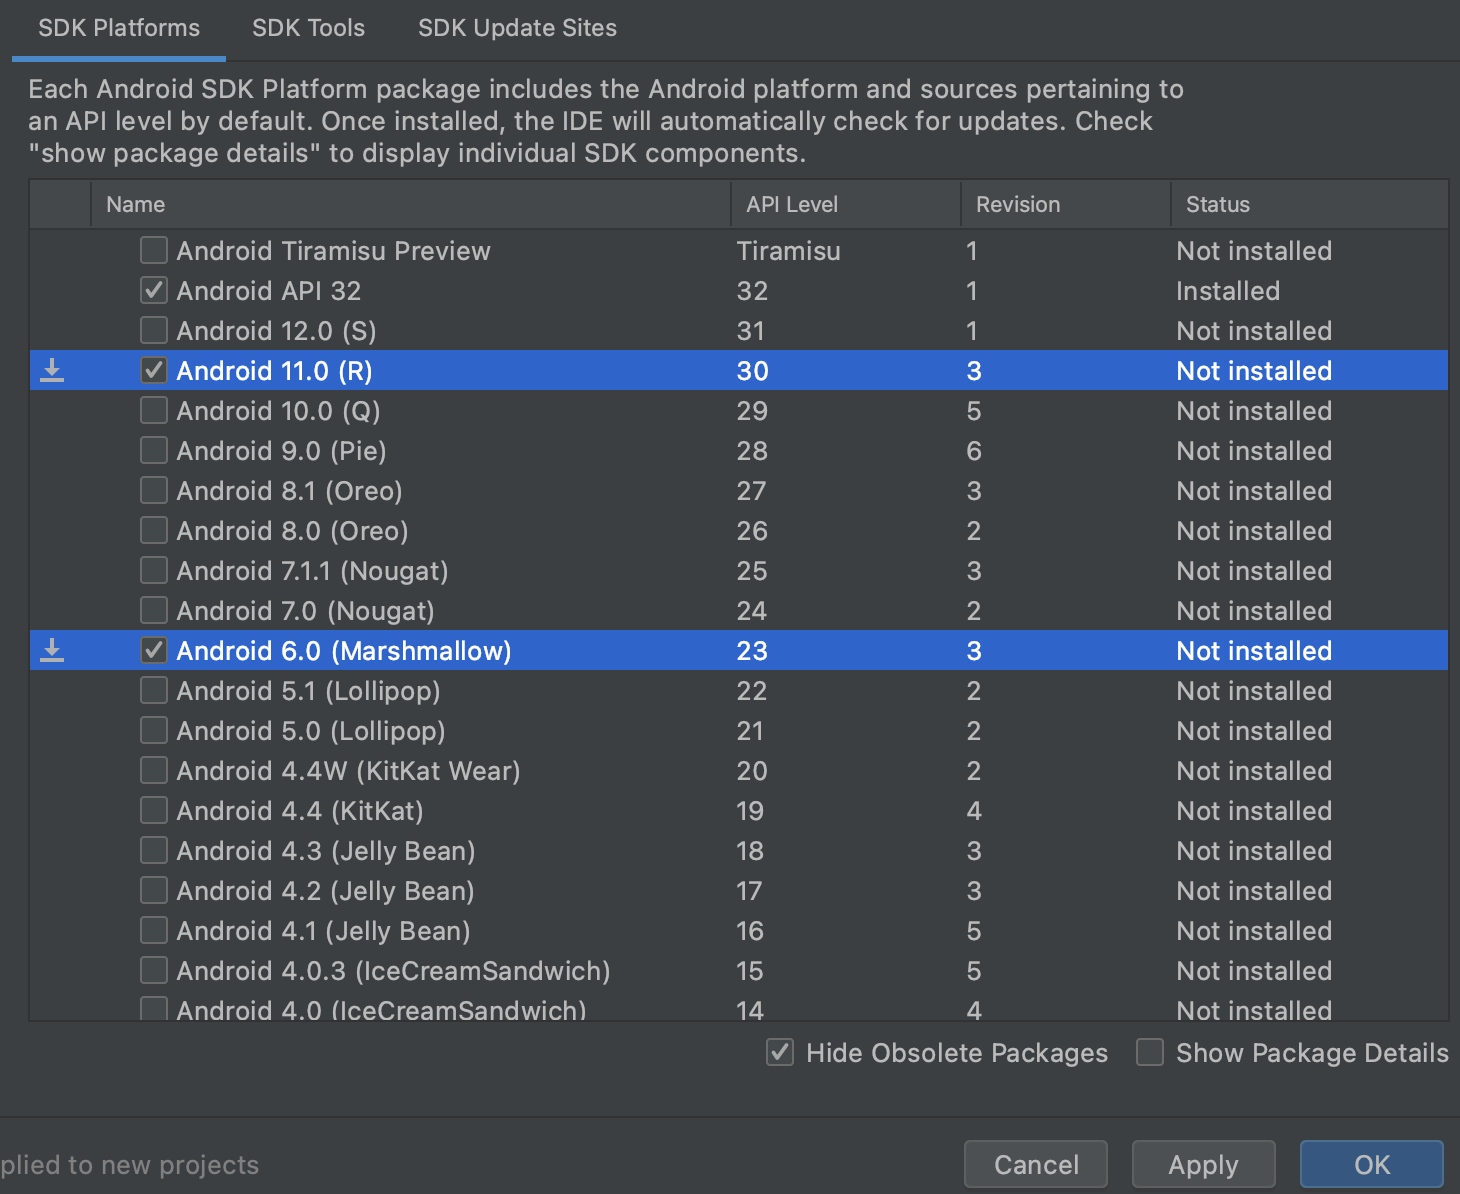
We now need to also install the oldest and latest versions of the Android SDK that we build our apps with, so that we can build and test our code changes locally ensuring both latest and oldest versions of Android still work:
- Android 14(UpsideDownCake) - which uses Android SDK 34
- Android 8.0 (Oreo) - which uses Android SDK 26
Note: You can find the targetSdk and minSdk in libs.versions.toml, please refer to these values.
The versions of Android SDK that is automatically installed in the previous step will most likely not be in use by our Android project, and may be much newer than the version currently supported by the version of React Native in our project.
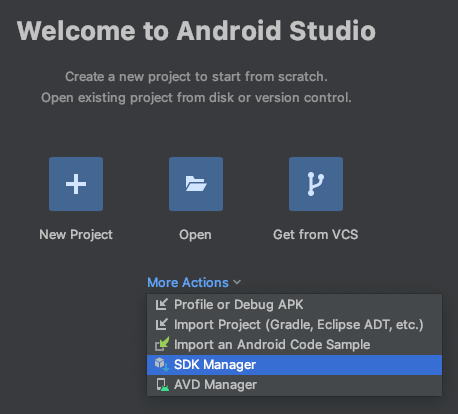
Open the SDK manager by pressing "More Actions -> SDK Manager" in the welcome screen of Android Studio:
Select both the latest and minimum API Levels found in libs.versions.toml in the screen that comes up, and press Apply to start downloading the tools we need. You may want/need to download additional versions of Android depending on which version you need to work on to test your code, but this will do for now.
- Note: This is the easiest way to download, install, and manage versions of Android, the Android SDK, and related Android development tools on your machine. You are welcome to use other methods, but you will need to be responsible for doing your own troubleshooting should you choose to do so.
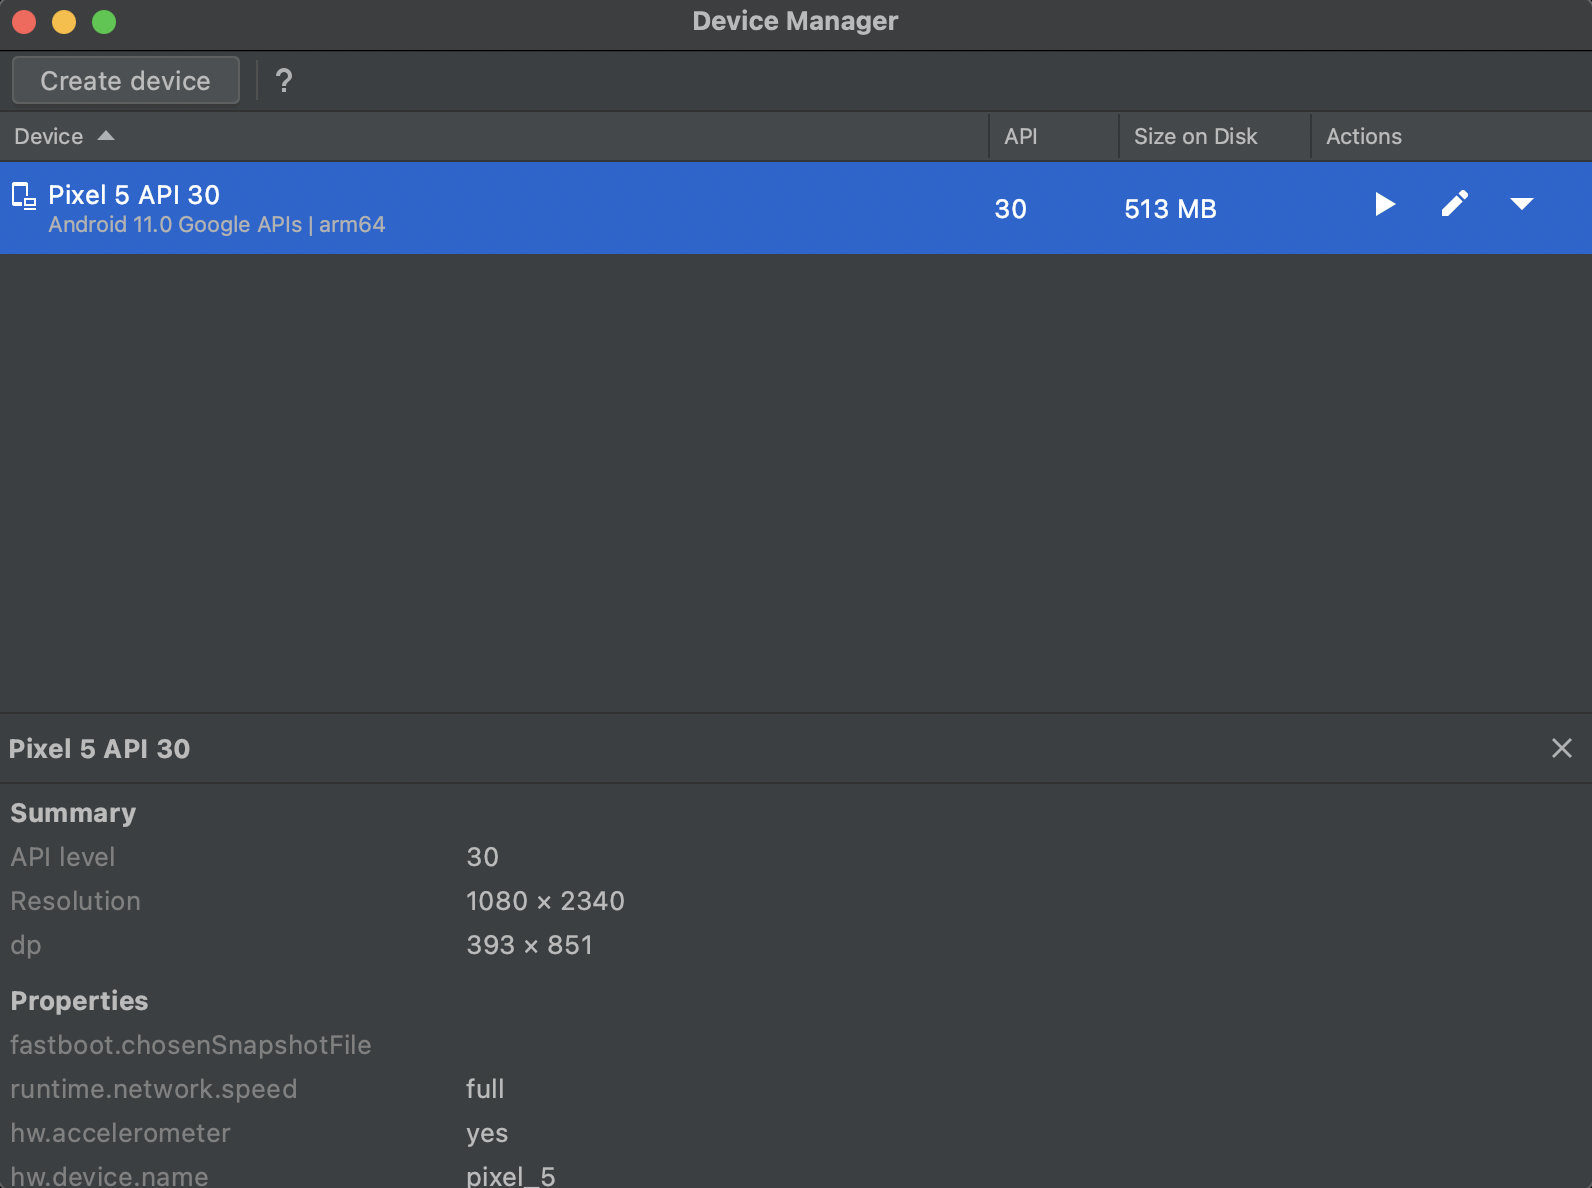
Now, we need to install an Android Emulator. To do so, close the SDK Manager screen by pressing OK, and back at the Welcome to Android Studio screen which should still be up, press the More Actions dropdown again, and select the Virtual Device Manager.

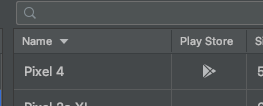
Press Create Virtual Device and then select one of the preconfigured device definitions or create one yourself, ensuring it has Play Store support:
In the System Image step, select an Android image that matches one of the Android SDK versions we've downloaded. The Recommended Images tab should automatically detect the type of machine you're on (M1 or Intel Mac), and only show you the relevant images for you. If you're on an M1 Mac, you'll want an ARM_V8A image, if you're on an Intel chip Mac, you'll want an X86_64 image.
Go ahead and hit Download on the version corresponding with the values found in libs.versions.toml and it will begin download it for you immediately.
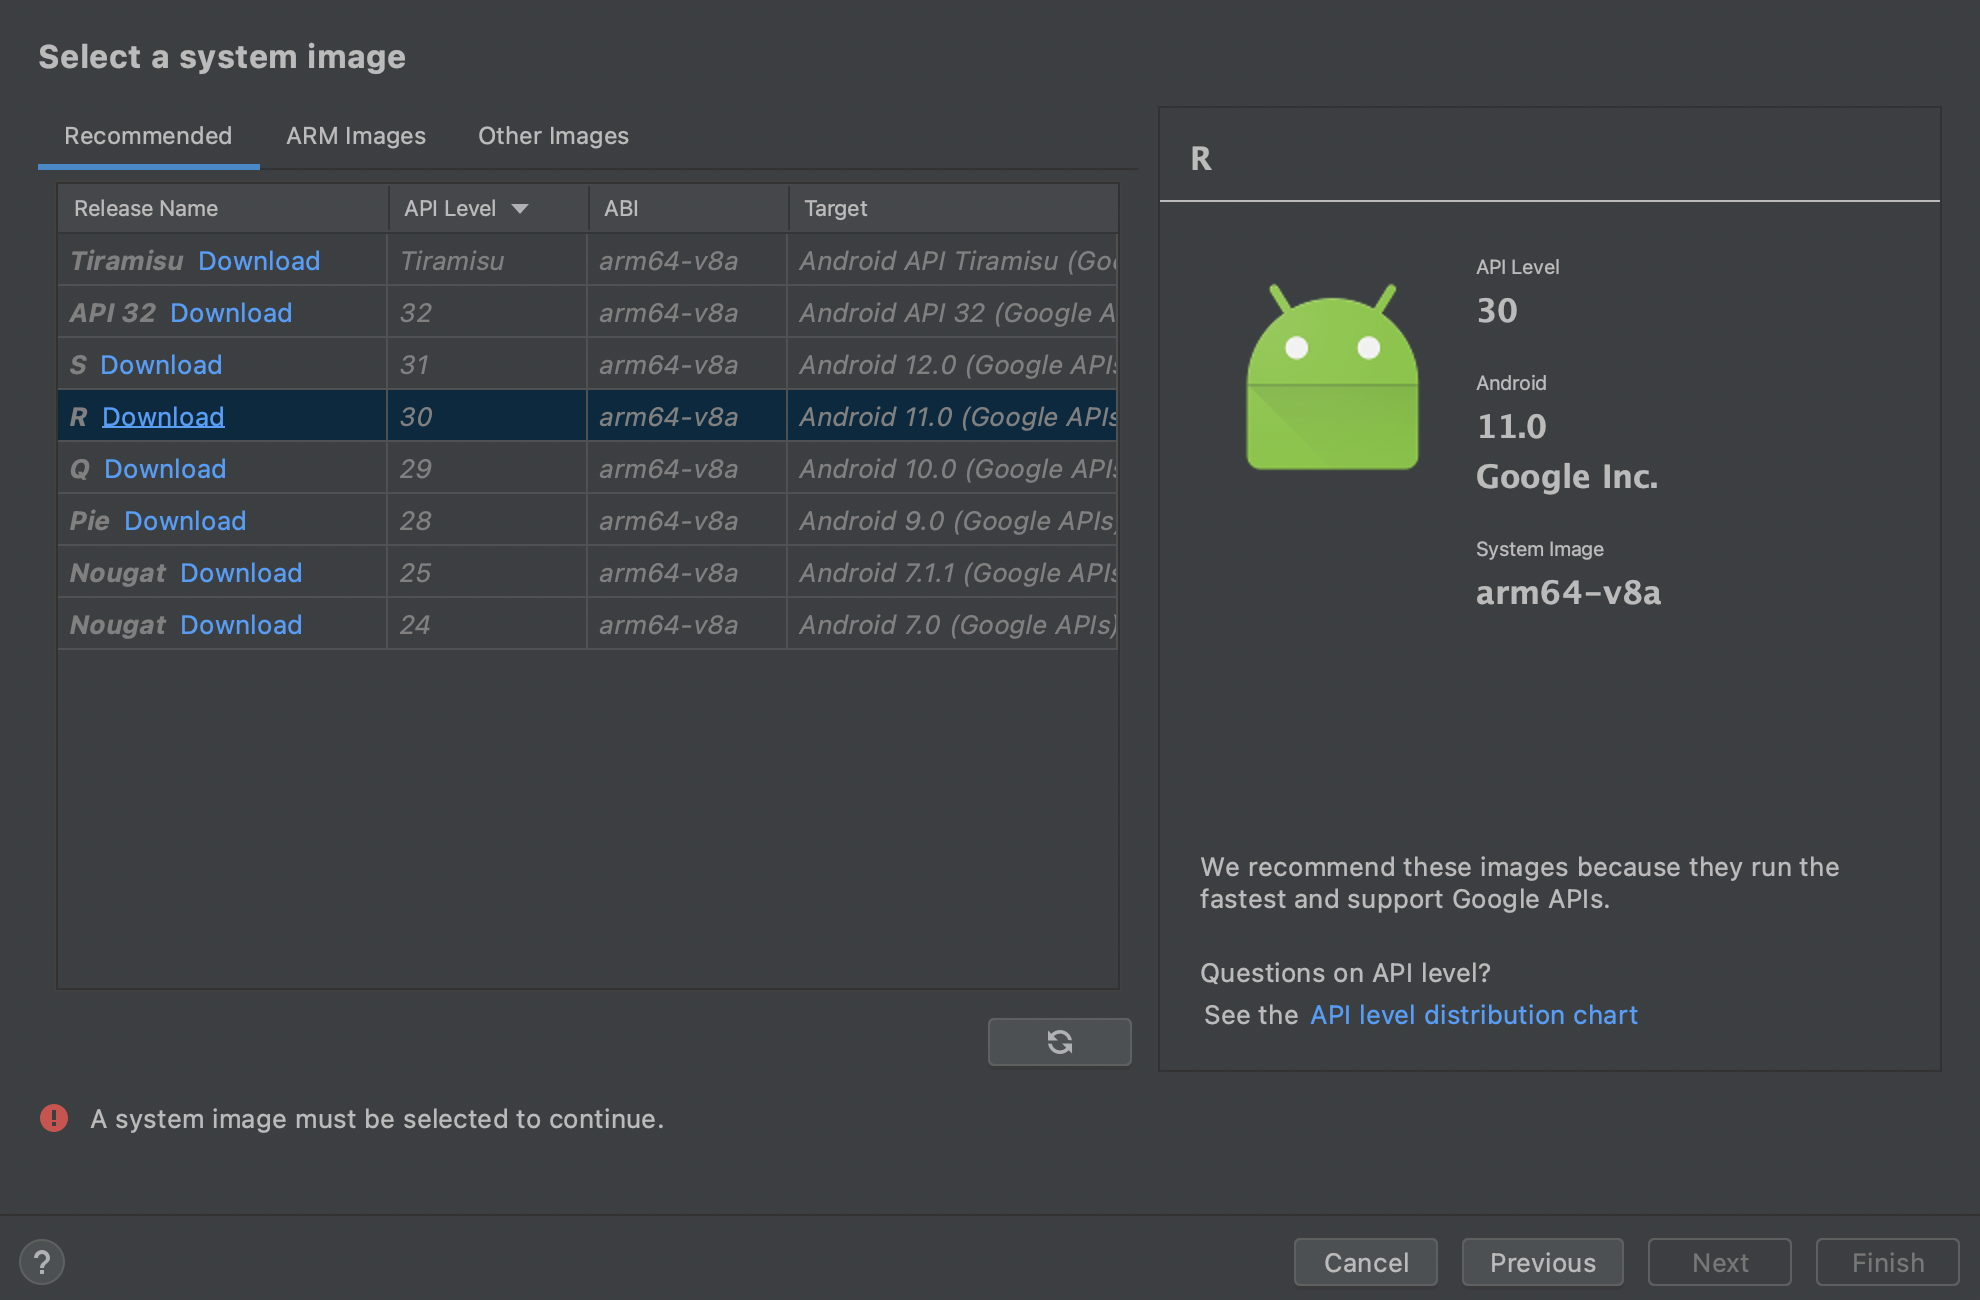
Once downloaded, click Finish, and through the menus and you should have your emulator set up and ready to go.
For everything to work properly when trying to build the Android version of the app with Android Studio, you'll need to set up a few environmental variables in your shell profile.
- Add the following lines to your
~/.zshrcfile:
# Android Environment Variables
export ANDROID_HOME=$HOME/Library/Android/sdk
export PATH=$PATH:$ANDROID_HOME/emulator
export PATH=$PATH:$ANDROID_HOME/tools
export PATH=$PATH:$ANDROID_HOME/tools/bin
export PATH=$PATH:$ANDROID_HOME/platform-tools
- After adding these, type
source ~/.zshrcin your terminal to load the config into your current shell, or completely close and restart it. - Confirm whether the
ANDROID_HOMEenvironment variable has been correctly setup by runningecho $ANDROID_HOMEin your terminal. You should see something like this:
developer.developerson@macbook ~ % echo $ANDROID_HOME
/Users/developer.developerson/Library/Android/sdk
developer.developerson@macbook ~ %
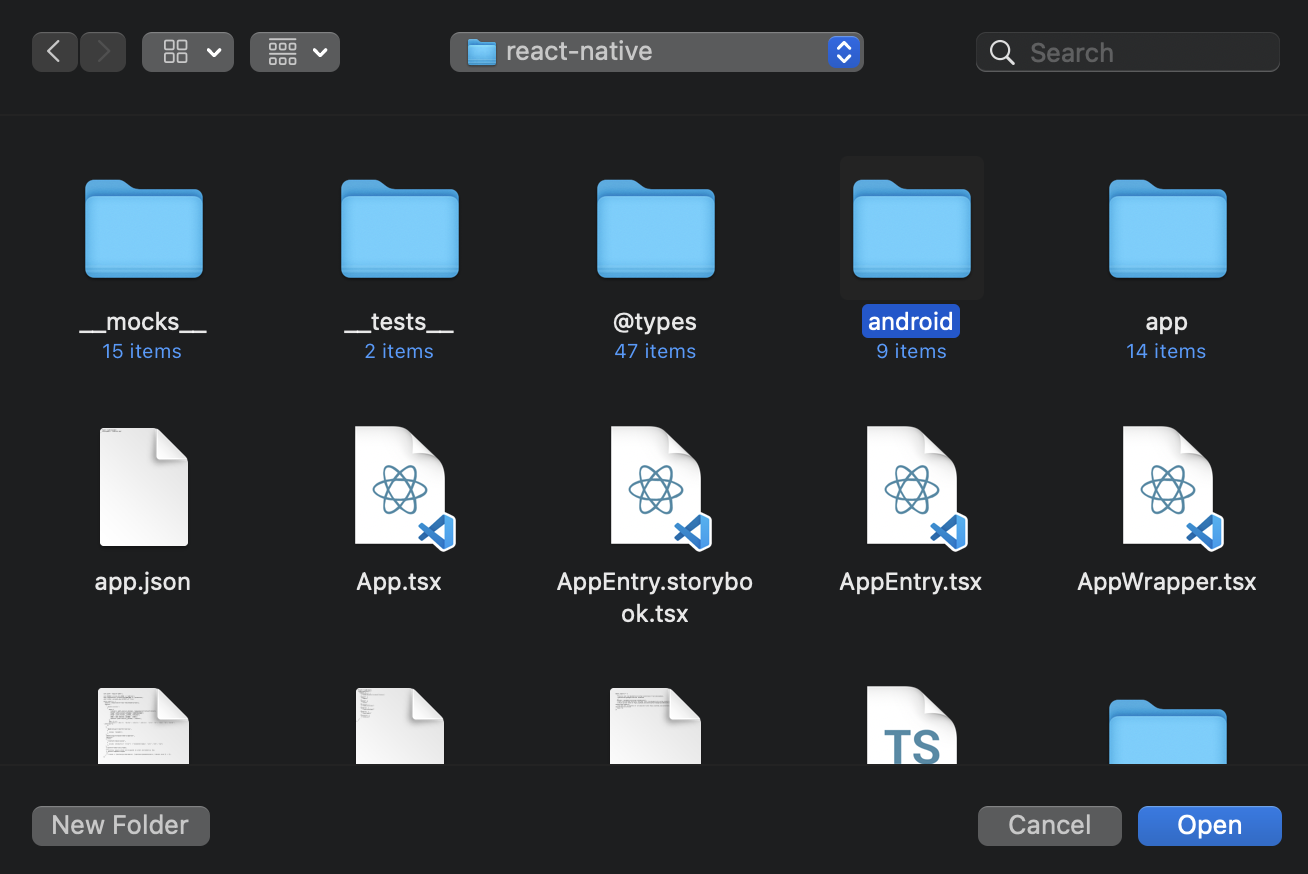
Now you are ready to open the react-native project you would have git clone'd earlier in the guide.
Navigate to the /android/ folder inside of the react-native repository, and open it in Android Studio. This will ensure that Android Studio can read all of the Android related setup and config files and setup things for you.
Android Studio will take some time downloading all of the Android related dependencies for the project through Gradle, in-built into the IDE. You should be able to see any status progress in the bottom right corner of Android Studio, as well as a Build log tab in the bottom left. Don't get freaked out by any warnings you see (as not everything is perfect as this isn't a pure Android project). Pay attention to Errors instead - though there shouldn't be any if you are on the main branch of our repo in git.
That's the end up the Android Studio setup.
General purpose code editor and IDE ✍️
While Xcode and Android Studio are purpose built to develop native iOS and Android code, most of the code you'll be looking at and editing is in fact based on web technologies, in JavaScript and TypeScript.
Therefore, having a more web-oriented or general purpose code editor or Integrated Development Environment (IDE) will serve you better, with a wider range of features and useful extensions than either Xcode or Android Studio.
We suggest that you download, install and use Microsoft's Visual Studio Code, although other code editors and IDE are perfectly fine to use. Use whatever you are most comfortable and productive with.
- Note that any examples and editor configuration shown in documentation offer examples assuming use of VSCode, so some additional setup or configuration may be needed for other editors and IDEs.
- Setup of your code editor or IDE is outside of the scope of this guide as there are too many settings and preferences to cover.
- Most of the requirements are covered by project level config files that your editor or IDE should automatically pick up (e.g.
.editorconfig,.vscode/if using VSCode). - If there are any questions you still have, if you're stuck, post a message in #dev-setup in Slack.
Some of your colleagues are also using Jetbrains' IntelliJ IDEA and WebStorm.
If you prefer something else not listed here, feel free to give it a shot, but you'll have to set it up yourself. e.g. If you're going to use vim, you probably don't need our help.
*We can get you a license for one of the JetBrains IDE's if that's what you want to use. Talk to your manager to get more info.
⚠️ VSCode on M1 Mac
Be sure to download the Apple Silicon version of VSCode, instead of the Intel Chip or Universal version, to ensure that if you are using the integrated terminal, it is not being run through Rosetta 2 and is instead running via the native ARM architecture**
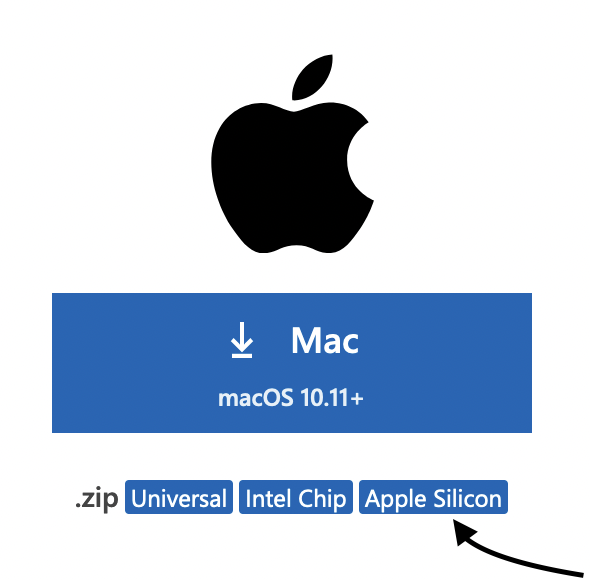
Head to the download page to grab to grab the Apple Silicon version.
For details on the issue of VSCode running the integrated terminal through Rosetta 2, see this Github issue on the VSCode project page
Linux setup 🐧
⚠️ Use a Linux+GNU distribution at your own discretion whilst working on this project.
Given that React Native targets both iOS and Android, and our apps are for both platforms, using Linux to develop on this project is not advised, as you will only be able to implement and test for Android.
Installing and Running the Native Apps 🏃♂️
Once you've set everything up above successfully, you're ready to start installing and running the app locally.
Read and follow the guide here on installing the app dependencies and then running it either on your machine on a simulator (iOS, on Macs only*), emulator (Android) or on an actual mobile device.